 The chimney flashing is a protective metal barrier around the area where your chimney meets your roof. Made from copper, aluminum, or steel, this flashing creates a watertight seal. This prevents water from leaking into your home and protects your roof and chimney structure. However, if the flashing isn’t performing as intended, then it might be time for a chimney flashing repair. In today’s guide, we’ll explain what this repair entails and what signs to look out for.
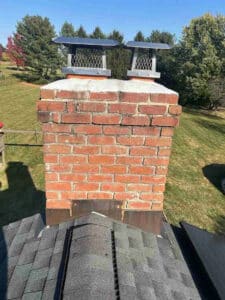
What Is a Chimney Flashing Repair and Why Is It Necessary?
A chimney flashing repair focuses on the metal barrier that seals the joint between your roof and chimney. Because the flashing protects your home, roof, and chimney from leaks and water damage, it’s a vital component that requires proper maintenance. Ignoring minor issues can compromise the integrity of your chimney and lead to major repairs down the road.
What Are The Most Common Problems Requiring a Repair?
If you’re noticing any of these signs, then it’s time to call in a professional to evaluate your chimney flashing:
- Signs of water damage: Water damage can look like water stains on your ceiling or the walls near your chimney, visible rust or corrosion on the metal flashing, or mold and mildew near your chimney or attic.
- Signs of water leaks: If you hear dripping sounds or see visible water leaks during rainfall, especially in the area near your chimney, this could be due to an issue with the flashing.
- Missing or damaged flashing: If there are pieces of the metal flashing that have gone missing, or you see visible damage on the flashing, then it won’t perform as intended.
What Does the Repair Process Look Like?
Once you call in a professional, you can expect them to take these steps to repair your chimney flashing:
- Inspection: Your repair technician will inspect the existing flashing for signs of damage and remove any old or corroded flashing.
- Cleaning: They’ll clean the area thoroughly to ensure they can properly install the new flashing with an optimal watertight seal.
- Measuring: Your technician will measure and cut new flashing pieces to fit your chimney perfectly.
- Installation: Once the area is prepared and the flashing pieces have been cut, your technician can install the new flashing. They’ll start by installing the base flashing at the bottom, followed by step flashing on the sides. Finally, they can install the counter flashing at the top.
- Securing and finishing touches: After all of the flashing pieces are installed, it’s time for finishing touches. Your technician will secure the flashing with nails, apply roofing cement along the seams, and seal joints with roof caulk to prevent leaks.
If your chimney flashing is in need of a repair in Rhode Island or the Berkshires, call the expert team at Local Chimney Services! With over 12 years of experience and more than 15,000 satisfied clients, Local Chimney Services is dedicated to ensuring safety, efficiency, and long-lasting chimney performance. Call 508-978-1064 or fill out our contact form to schedule your appointment today!